Modifying Android 4.0 low screen brightness
Preface
After having the Nexus S phone a while and having the power to run any Android build I wanted, I’ve naturally looked around for a custom ROM. ROMs were basically custom built Android versions, with various tweaks and modifications. There was a nice, clean custom ROM posted on xda-developers called Bugless Beast by author Peter Alfonso a.k.a. BuglessPete and was very popular at the time. It was close to stock and included only thoughful modifications. After trying it out, I’ve ran it quite some time. But there was a thing bothering me even from the initial Android 4.0 ICS release.
Screen brightness levels
Most modern phones have an ambient light sensor1 in the front of the device which measures the levels of light around it. In device settings this is indicated by setting Automatic brightness on or off.
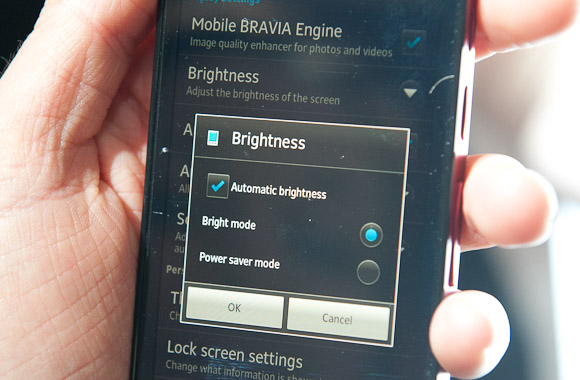
Auto brightness setting, as seen on Xperia P (Photo Credit: esato.com).
Sensor measures light before the screen and adjusts the screen brightness according to it. This way ideally the brightness gets to maximum levels outside on the sun and minimum levels when inside in a dark room.
When Google presented their Android 4.0 ICS release, they’ve made a change in the first brightness level at lowest reading. This resulted that the screen was really too dim for my personal taste while being inside in a room. But as I had some experience with modifying Android source now, I’ve started looking through the ICS code where to find any values for the light sensor and to compare them with Gingerbread values.
It didn’t took long.
Changes from GB to ICS
Hugely popular custom ROM CyanogenMod had all its code posted on GitHub, which made it really simpler to browse around the Android source. I had a hunch that the values most reside somewhere in the framework part, since most core Android configurations reside there, as I’ve also had some experience with modifying the Samsung Galaxy S before. So after some browsing around, I’ve found it.
    <!-- Array of output values for LCD backlight corresponding to the LUX values
         in the config_autoBrightnessLevels array.  This array should have size one greater
         than the size of the config_autoBrightnessLevels array.
    -->
    <integer-array name="config_autoBrightnessLcdBacklightValues">
        <item>10</item>
        <item>35</item>
        <item>55</item>
        <item>70</item>
        <item>70</item>
        <item>250</item>
    </integer-array>
The configuration was in /overlay/frameworks/base/core/res/res/values/config.xml, as seen here.
Knowing the location of the config, I’ve looked for the same file but within Android 2.3 Gingerbread source.
<!-- Array of output values for LCD backlight corresponding to the LUX values
         in the config_autoBrightnessLevels array.  This array should have size one greater
         than the size of the config_autoBrightnessLevels array.
    -->
    <integer-array name="config_autoBrightnessLcdBacklightValues">
        <item>35</item>
        <item>55</item>
        <item>70</item>
        <item>70</item>
        <item>250</item>
    </integer-array>
It was in the same file /overlay/frameworks/base/core/res/res/values/config.xml, as seen in the Gingerbread branch here.
When comparing both configurations it’s obvious that the first level was changed from 35 to 10, so no wonder the screen got so dim. I didn’t thought about why Google made this change much, but rather went on to make the changes and build a new fixed Android framework.
Building with new levels
There was one thing though - I couldn’t make the changes for the AOSP version of Android, because its framework would be incompatible with Bugless Beast custom ROM. But as I decribed on the previous post, I had the knowledge to grab the sources for Bugless Beast and compile my own version, since author kindly posted all its source on GitHub as well.
At first I had to make a new working directory and initialize the repo for Bugless Beast.
$ repo init -u git://github.com/peteralfonso/platform_manifest.git -b icsAfter that I could download the source.
$ repo syncAfter the source was downloaded, I made the according changes as above to platform/frameworks/base/core/res/res/values/config.xml and re-built the framework with mmm.
$ mmm frameworks/base/core/resThis results with a freshly built framework-res.apk in out/target/product/generic/system/framework/.
Flashing the new build
Easiest way to distribute newly built system .apks is via flashable .zip files that are flashed in a custom recovery2. This way if there’s an error with the new build, you can provide a restore .zip that brings back the phone to life.
Adding .apks to a .zip file like this is easily done with an archiver software like WinRAR or similar.
├── system/
|    ├── framework/                     # folder where the .apk will be flashed to /system/framework
|        ├── framework-res.apk          # framework .apk
├── META-INF/
|    ├── com/
         ├── google/
             ├── android/
                 ├── updater-script     # script where you declare how the .zip should operate
                 ├── update-binary      # update binary compatible with the signature, it's reusable
|    ├── CERT.RSA                       # signature files which
|    ├── CERT.SF                        # are reusable
|    └── MANIFEST.MF                    # in every .zip
This is the the basic structure of all flashable .zip files. The main gist is in the update-script part, which is written in Edify and we need to modify like this:
show_progress(1.000000, 0);

ui_print("Mounting /system");
run_program("/sbin/busybox", "mount", "/system");
set_progress(0.125000);

ui_print("Deleting old framework-res from /system");
delete("/system/framework/framework-res.apk");
set_progress(0.375000);

ui_print("Extracting files to /system - ICS framework-res brightness fix");
package_extract_dir("system", "/system");
set_progress(0.625000);

ui_print("Unmounting /system");
unmount("/system");
set_progress(0.875000);

ui_print("Installation complete!");
set_progress(1.000000);
It’s pretty well commented and doesn’t need special explanations. This is the simplest way how to replace a system .apk. More information about how to create even more complex Edify scripts can be found on xda-developers.
Of course we also want to make a same flashable .zip with the original .apk, so users who might want to restore the previous state might do it easily.
Conclusion
I’ve posted the above modification in the Bugless Beast xda-developers forum couple times as he was continuously updating his ROM, I’ve stopped only after switching to CyanogenMod custom ROM who had an option to modify brightness levels built-in.
But at the end, this was another learning experience for how to go from a problem to solution with thinking programatically and applying the knowledge achieved before.
- More on http://www.wikid.eu/index.php/Ambient_Light_Sensor [return]
- All about custom recoveries here http://www.addictivetips.com/mobile/how-to-install-a-custom-recovery-to-an-android-phone-device/ [return]